Incorporating iterations into a model
What will you learn?
- Iterations
- Using Register Viewer
- Functors:
- Repeat
- Step
- Extract Map Attributes
- Load Categorical Map
- Calculate Value
- Mux Lookup Table
- Set Lookup Table Value
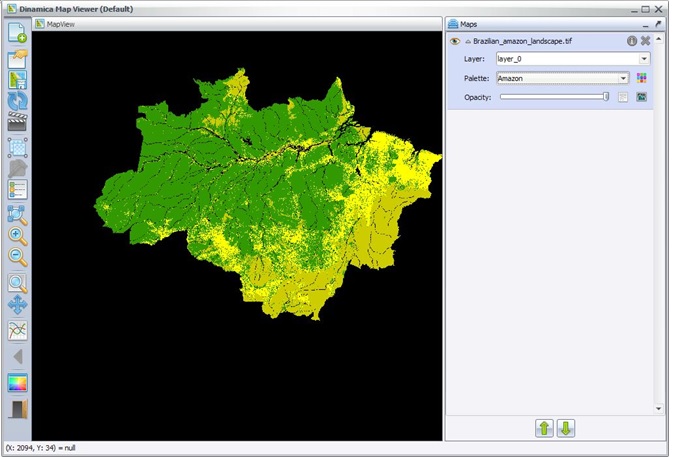
Open the file brazilian_amazon_landscape.tif located in the folder lesson2 on the Map Viewer. Use “Amazon” as the current color palette. This is a land cover map of the Brazilian Amazon. The map has the following classes:
1 – Deforested (yellow)
2 – Forest (green)
3 – Non-forest (light brown)
The intent of this exercise is to calculate the extent of remaining forest within each state.
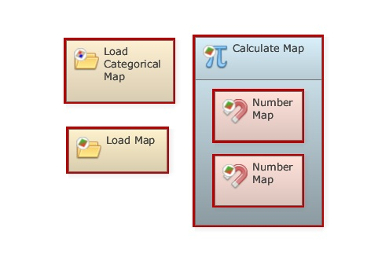
Begin placing one Load Map and one Load Categorical Map on the sketch. This latter functor will categorize a map if it is not categorized, i.e. cell values are identifiers to map classes, so when a map is loaded, it browses the map to identify all unique cell values that represent different categories or map classes, producing as a result a list of classes, which becomes embedded in the map header. Place one Calculate Map and two Number Map functors inside it.
Now assign a number to each Number Map and then connect Load Map and Load Categorical Map to them.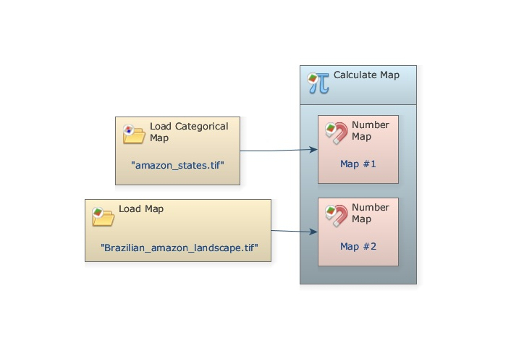
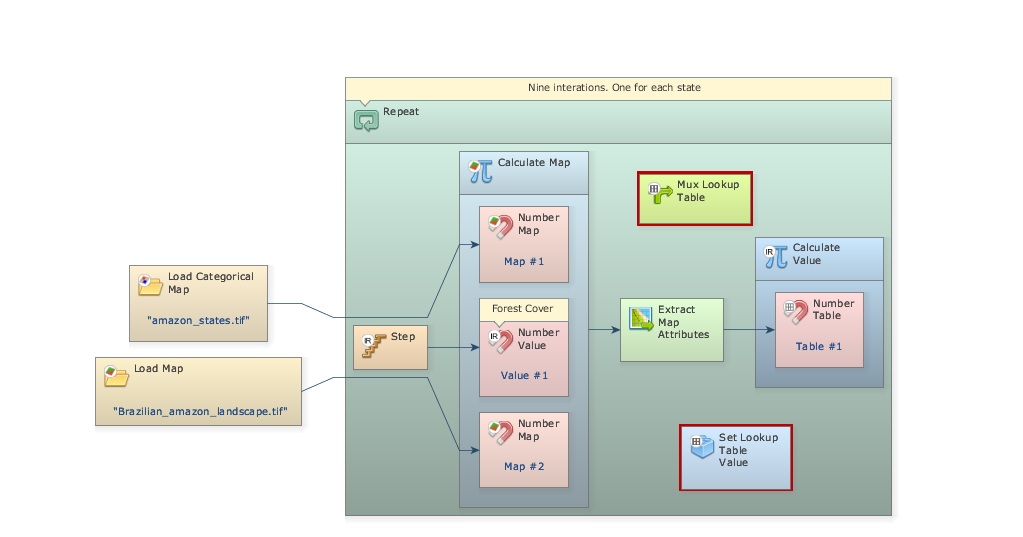
Load amazon_states.tif using the Load Categorical Map and “Brazilian_amazon_landscape.tif” with Load Map. Add a Number Value from hook tool in the Calculate Map, assign “1” to it and write the following equation:
if i1 = v1 and i2 = 2 then 1 else null
A value is represented by v# (v1, v2, ..vn). Close the container. Do not forget to set the Cell type to “Unsigned 8 Bit Integer” and Null Value to “Use default value”.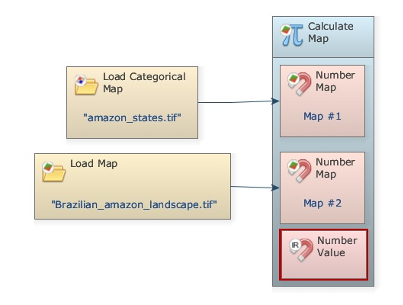
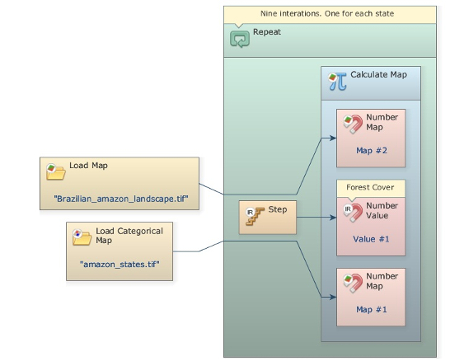 Grab the container Repeat from the Control tab and place it on the sketch. Drag Calculate Map into it. It will automatically resize to envelop Calculate Map. Then add the functor Step into Repeat. Open Calculate Map by clicking on its top left icon and connect Step to Value port of Number Value.
Open Repeat with the Edit Functor tool and insert “9”.
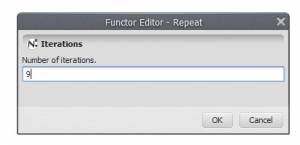
This implies that the model will iterate 9 times. The Step functor self-associates to the enveloping container and passes to Calculate Map the current step. Thus for each iteration Calculate Map produces a map containing the remaining forest (value 2) for each state.
Now you need to sum all cells that represent forest. Note that the output is a binary map with only ones and nulls, the latter is represented by zero. Next, use Extract Map Attributes (Map Algebra tab) to extract the sum of non-null cells. This functor produces as output a table with these map attributes.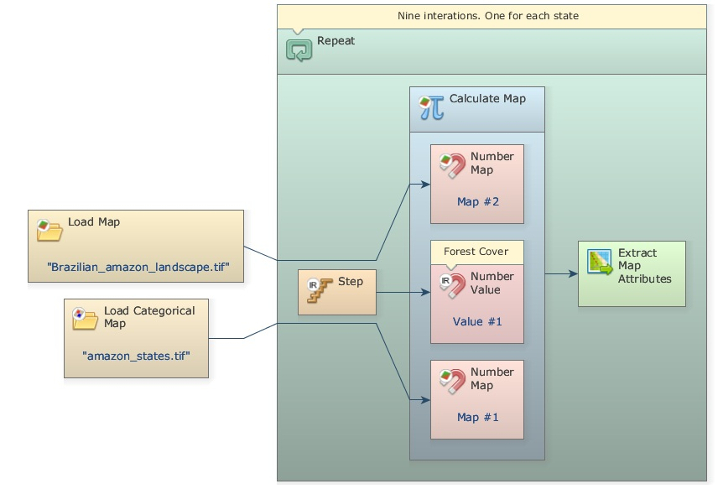
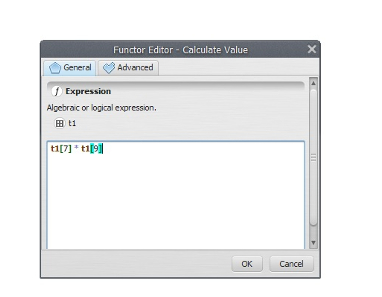
The area extent is the sum of non-null cells (field 9) multiplied by the cell area in hectares (field 7). You need to add one Calculate Value, located in the Table tab, to perform this calculation. Also, select one Number Table clicking in Create a hook (magnet icon) inside functor action bar, which will receive the attribute table output from Extract Map Attributes. You need to enter “1” to assign an identifier for this table. Finally, write:
t1[7]*t1[9]
(cell area (in hectares) * sum of the values (excluding null cells))
t1[7] * t1[9]
expression with
t1[“cellArea”] * t1[“nonNullCells”]
All the attributes produced by Extract Map Attributes and Extract Lookup Table Attributes can be replaced by the corresponding attribute predefined names. See Extract Map Attributes and Extract Lookup Tables Attributes for a list of predefined attributes names.
Note that t1 means table #1. In this case, the brackets are needed to represent the value associated to a table key.
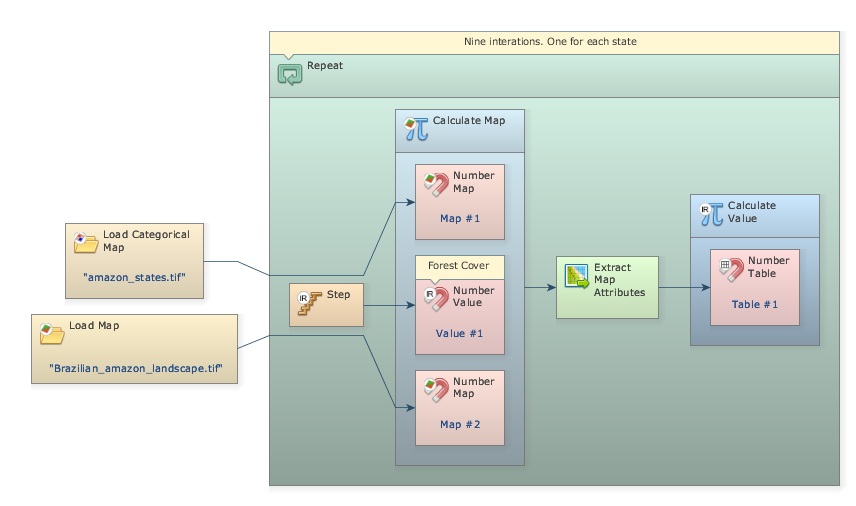
Now you need to fill in a table in order to store the area calculated for each state. The functor Set Lookup Table Value updates a lookup table placing a value to a position defined by a key. To fill in the entire lookup table, you need to develop a loop that enables this functor to browse through the lookup table. To close this loop, you will need a functor that is key to the development of dynamic models. Here we introduce the concept of Mux functor.
A Mux functor can be a map, a categorical map, a lookup table, a table or a value. Look at the Control tab to find Mux Lookup Table and drag it into Repeat. Also drag Set Lookup Table Value from the Lookup Table tab.
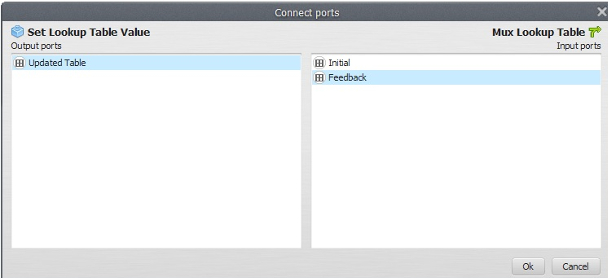
Now, click on the Mux Lookup Table with the Edit Functor Ports. Every Mux functor has two input ports. In the first iteration, it reads the input from the Initial port; thereafter it receives the data from the model step through the port Feedback. This process allows data to be updated by the model, thus becoming dynamic. Hence this functor is key to the incorporation of feedback into a dynamic model. Also open Set Lookup Table Value with the Edit Functor Ports.
This functor receives a table that will be updated with a value placed in a position defined by a key. So you need to connect table output from the functor Mux Lookup table to the input port of Set Lookup Table Value.
Again, let’s connect the output from Set Lookup Table Value to Mux Lookup Table. When a connection has two or more options, the Edit Functor Ports window opens automatically. You have to choose the port Feedback.
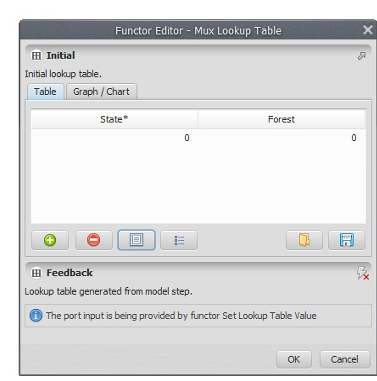
Now click on the port Initial with the right mouse button. You will open a table editor. In this case you just need to enter “0“ and “0” as Key and Value for the first table record, and then save these inputs using the ”+” button.
Still, you need to connect the output from Calculate Value to the input port of Set Lookup Table Value.

The Edit Functor Ports window pops up because there are two options. Connect the arrow to the port Value; the key comes from the current model step via the connection of Step to Set Lookup Table Value.

Click on the layout tool Left to Right and your model will look like the one below.
Observe that the feedback connection is between Mux Lookup Table and Set Lookup Table Value. As a last step, you need to save the lookup table into a file. Drag the functor Save Lookup Table from the Input/Output tab. Connect Set Lookup Table Value to it and edit the name for the CSV file. Although Suffix Digits is “2” by default, the file name won’t have a suffix because it will be saved after Repeat is done.
Save it and if everything is O.K., click on the run button. This may take a short while.
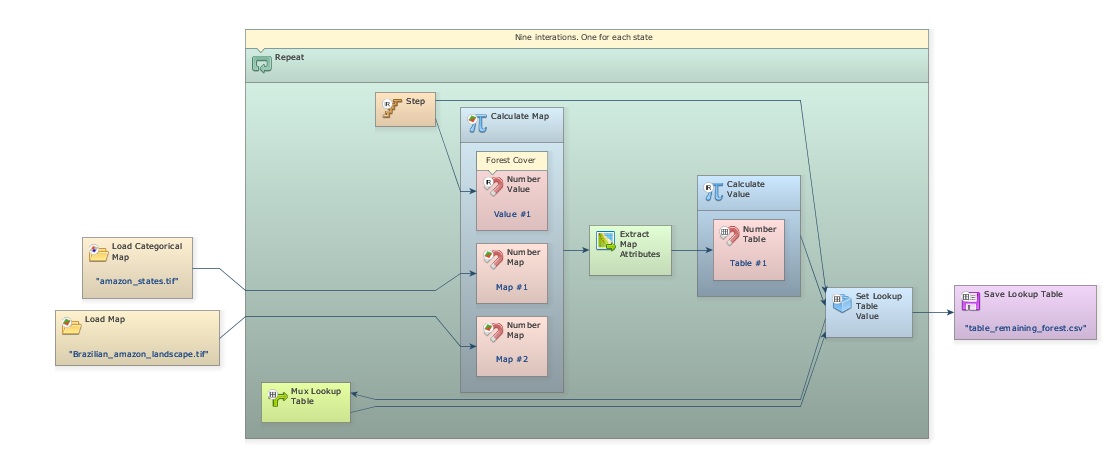
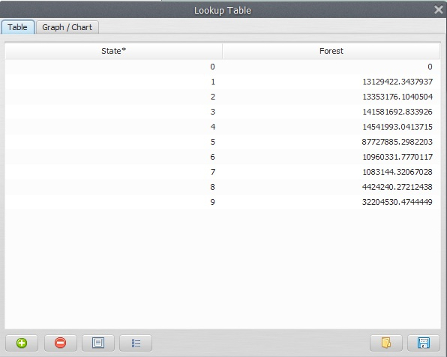
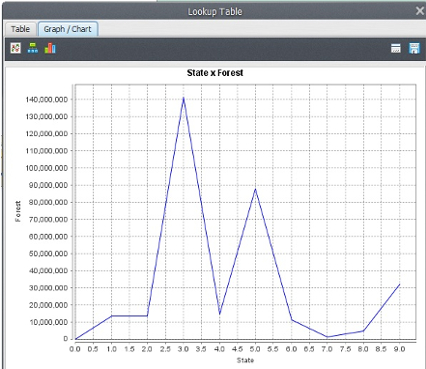
Go to Set Lookup Table Value, open inspect functor into functor action bar and click to inspect the output port Updated Table and run the model again to view the result. Also make a chart clicking on the chart button (bottom left).
These are the areal extents of the remaining Amazon forest in hectares per state.
You have successfully completed the two introductory lessons. Another way to solve the query of this lesson is through the use of a subset of Region functors. This will be the topic of the next lesson.
